Gérer les cookies utilisés pour la publicité, tels que la personnalisation des annonces, le remarketing et l’analyse des performances des annonces.
2.14.9.13. Configure mail in PrestaShop
PrestaShop has several types of users for receiving emails. By default, there are two users, "WebMaster" and "Customer service", each of which is used for specific tasks.
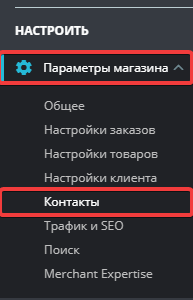
Add contacts
- Open the "Store settings → Contacts" section:
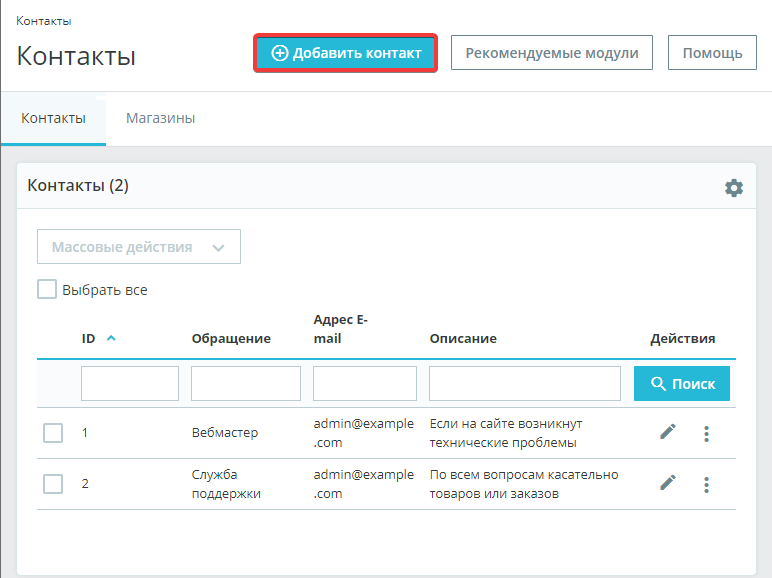
- Click "Add contact":
- Enter the new contact details and click "Save":
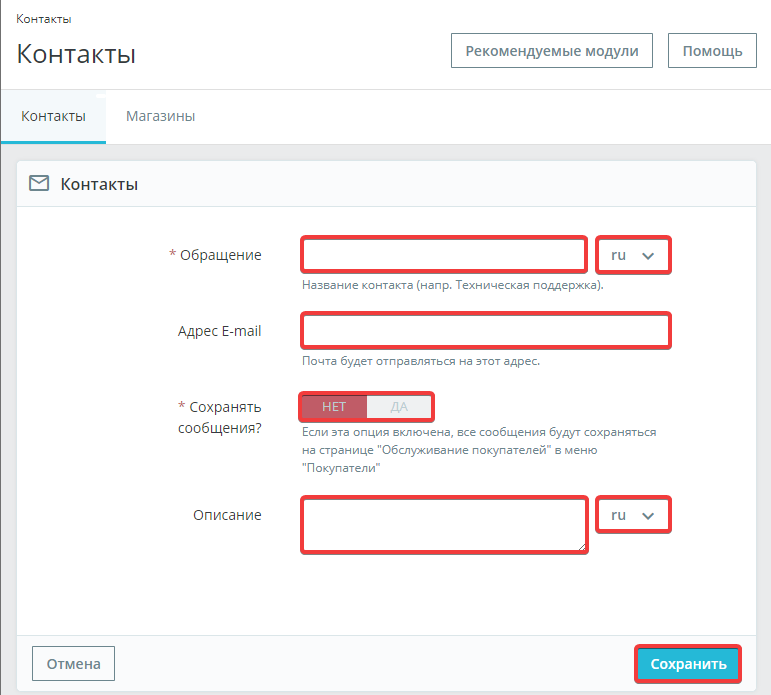
- "Contact" — the name of the contact. It will be displayed to customers within the CMS itself.
- Language settings. Both language settings are changed.
- "Email address" — the contact's email address where messages will be sent.
- "Save messages?" — saves messages within the CMS. Saved messages will be available in the "Customer service → Customer service" section.
- "Description" — a detailed description of the contact.
- Language settings. Both language settings are changed.
Configure mail sending
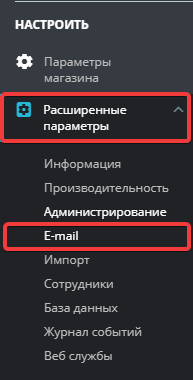
- Open the "Advanced settings → E-mail" section:
- Specify the settings for sending mail and click "Save":
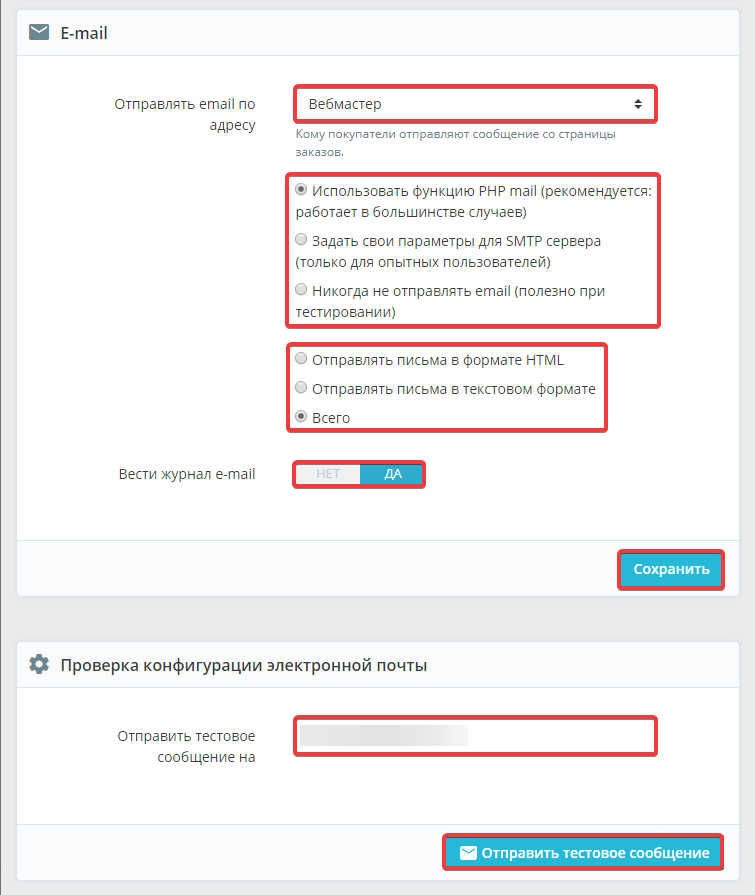
- "Send email to address" — the contact to whom emails from users will be sent by default when an order is placed.
- Select the method for sending messages:
- "Use PHP mail function" — sending using the PHP
mailfunction. Not recommended - "Set your SMTP server settings" — send from an existing mailbox via SMTP. Recommended
After selecting this method, the SMTP settings will appear. - "Never send email" — blocks all emails from being sent.
- "Send messages in HTML format" — send messages only in HTML format with formatting (some mail clients may not support such messages).
- "Send messages in text format" — send messages in text format only.
- "Total" — messages sent using both options.
- "Keep e-mail log" — logs sent messages for later review or debugging.
- "Send test message to" — specify the mailbox and click "Send test message" to test sending messages.
Sending mail via SMTP
- Select the sending method "Set your own parameters for the SMTP server" (see above).
- Specify the settings for connecting to the mail server (use connection credentials or your own credentials):

- "Mail domain" — the name of the mail domain. Do not specify if you are not sure whether it is necessary (if the mailbox is with us, leave it blank).
- "SMTP server" — the address of the mail server.
- "SMTP username" — full name of the mailbox from which sending will be performed.
- "SMTP password" — your mailbox password.
- "Encryption" — encryption type (if the mailbox is hosted by us, use "SSL").
- "Port" — the port for connecting to the mail server (if the mailbox is hosted by us, use
465).
- Set the store's email address to the same as specified in the "SMTP username" field.
- Open the "Store settings → Contacts" section:
- On the "Store" tab, in the "Contact information" section, in the "Store email" field, enter the same email address as in the data for connecting to the mail server:

(1)